BMW E36 Blog

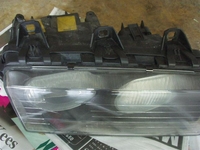
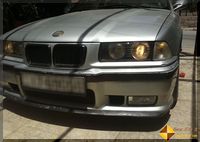
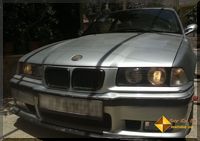
De-Lensing BMW E36 Headlights … DIY

12th June 2012

De-Lensing BMW E36 Headlights … DIY

 
I’ve seen many good looking BMW E36 cars and I always noticed that they have one thing in common. It’s the standard Bosch headlights, but for some reason, the headlights looked a little bit weird. These headlights were actually delensed.

The Bosch original headlights have lenses that will help move the light in the correct directions. Unfortunately, these make the headlights (and the car) look ugly.

I thought that de-lensing is a hard job to do and honestly, I was worried that the result isn’t worth it. After I read about it and found that the job is easy and totally reversible (which is a major point to me), I thought I would give it a try. This is what I did:

1. First, I had to remove the headlights so that I can work on them easily. To do that, I had to start by removing the corner lamps or signal lights. Simply, use a screwdriver to pry the clip that holds the signal light to the main headlight. Then slide it forward carefully.

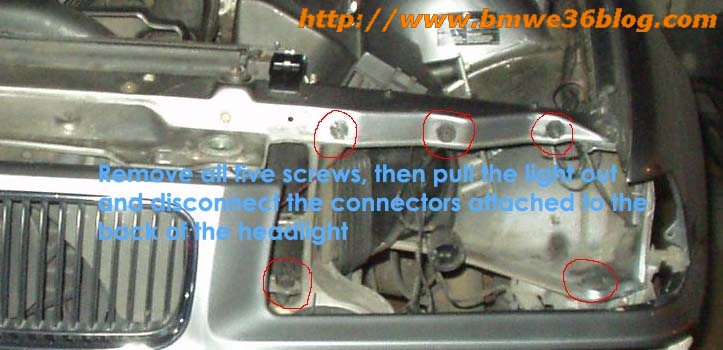
2. After that, I removed the headlights. It’s an easily job. You can simply reverse what I’ve done in my previous Replacing BMW E36 Headlights post. Just keep in mind that there are 5 screws that hold the headlight. 3 at the top and 2 at the bottom. Remove the screws and slide the headlight forward a little bit so you can disconnect the sockets from the back of the headlight.

After that, remove the headlights completely and put them at a table so you can work on them safely.

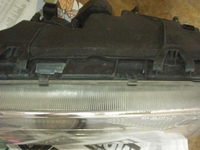
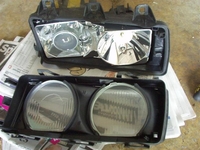
3. On each headlight, there are 5 big plastic clips (3 on top and 2 on the bottom). With a flat-head screwdriver, unhook them CAREFULLY. As soon as you’re done, the front part of the headlight should come off.

4. Take a breath and enjoy checking out the reflectors at the back part of the headlight. When the lenses come off, the reflectors will be easier to see from the front of the car which is going to be a sweet look.

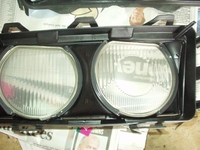
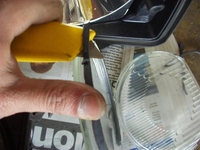
5. Notice that both lenses are held in by factory silicone. Using a blade, slice them off. Your lenses should now fall out quite easily. If they don’t, you can use a flat-head screwdriver to gently nudge it out. Be very, very careful!

IMPORTANT: you must keep those lenses (2 on each headlight) in a safe place in case you decide to go back to the old look.

6. Clean the insides of the headlight thoroughly. I sprayed window cleaner then used newspaper to wipe it clean. You may want to wipe the reflector for the low beam as well. I didn’t do that though because it was very clean.

7. Now, hook the front part of the headlight to the rear part carefully (without the lenses of course), and then, put everything back the way it was. Now, you have de-lensed your BMW E36 headlights… Congrats!

8. Last part of this DIY. Did “LIKE” our BMW E36 Blog page on Facebook? If you haven’t done so yet, please do now. Just click the “LIKE” button below this.

Please leave a comment about whether your car looks better this way or before de-lensing it?


BMW E36 Blog: The Ultimate BMW E36 Information Source.

Want to receive exciting tips & information about BMW E36 cars? Enter your Email:-


posted in Do It Yourself, Exterior, Technical Info, Tips & Tricks, Uncategorized | 1 Comment

11th June 2012

Replacing BMW E36 Headlights … DIY


Hello,

If you’ve seen my BMW E36 pictures before, you’d know that I have low quality Chinese headlights. When I bought the car, I knew these headlights are not the best (lighting-wise), but I kinda liked the way they looked and of course the angel eyes with blue circles added to that look. So, I thought that I can’t replace them easily while keeping the car looking as good as it looked back then.

With time, these headlights started to show the marks of age and since they’re made of plastic, they were deteriorating fast. A month or may be 2 ago when I showed you that BMW E36 Headlights Guide, I thought to myself that may be it’s time that I replace those old-dusty-looking headlights with some original ones that are made of glass (this was my top priority). Headlights can be of huge effect on whether the car looks nice or looks old. Since glass headlights are not affected by time (at least, they are better at that than plastic), I made up my mind to get those glass headlights.

Replacing the old headlights with the new stock ones was very easy. If you care to learn how to do it, the most important thing is to keep in mind that there are 5 screws that will hold a headlight in place in BMW E36 cars.

Take a look at this picture. 3 screws at the top and 2 at the sides (bottom).

Lucky me, I found that my old headlights were using only 2 of the top screws to hold the headlight and the two at the sides were missing. So, I removed the 2 screws and the old headlights came out right away.


There was one catch here which made me realize how lucky I am, otherwise, this replacement task would’ve become a nightmare. The guy who changed the old stock headlights with these one-piece headlights was smart enough not to cut the sockets that were designed to plug into the original stock headlights. Instead, he scratched the wires and used auxiliary wires to connect the headlight wires with the old one-piece headlights. So, this meant that in order to restore everything to its original shape, I had to remove those auxiliary wires and tape the scratched wires. After that, I’ll just plug the sockets into the stock headlights and I’m done.

That’s exactly what I did. Then, I put the headlight in the correct place and slide it there carefully.

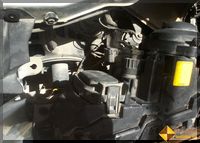
Before each headlight sits perfectly in its position, I connected the sockets to the the headlight.

Installing the turn signals was very easy too. The signal light with its socket will fit into the new stock turn signals perfectly. I didn’t have to do anything in there. Just plug them and you’re good to go.

Notice that you’ll have to be extra careful when sliding the turn signals to the side of the headlight. Never ever try to force it into position. If you’ve installed everything correctly, the turn signals will slide in perfectly with small pushing power.

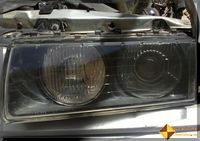
Next, I’ll post about delensing my headlights, but for now, I’ll leave you with these two pictures of the new stock headlights

IMPORTANT: If you’ve not subscribed to the BMW E36 Blog Facebook page, please do using the “LIKE” button below


BMW E36 Blog: The Ultimate BMW E36 Information Source.

Want to receive exciting tips & information about BMW E36 cars? Enter your Email:-


posted in Do It Yourself, Electrical, Exterior, Photos, Technical Info, Uncategorized | 3 Comments

20th May 2012

Supercharged BMW E36 M3

 
Hi Guys,

Take a look at this supercharged BMW E36 M3. It’s really awesome! I didn’t expect the car would have such powerful acceleration. It’s really amazing!


BMW E36 Blog: The Ultimate BMW E36 Information Source.

Want to receive exciting tips & information about BMW E36 cars? Enter your Email:-


posted in Performance, Uncategorized, Videos | 2 Comments

2nd May 2012

A BMW E36 Fast Drift

 
Hello,

Take a look at this BMW E36 drifting video. It’s very short, but really good. I wish I could do something like that with such accuracy. Take a look at 00:10 and 00:19. These parts are just awesome!


BMW E36 Blog: The Ultimate BMW E36 Information Source.

Want to receive exciting tips & information about BMW E36 cars? Enter your Email:-


posted in Uncategorized, Videos | 1 Comment

25th April 2012

BMW E36 with Corvette Engine – Art

 
Hi Guys,

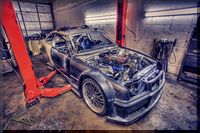
I’ve found some beautiful pictures of a BMW E36 that’s being modified to install a Corvette engine as a replacement of the original engine. The images have been modified by Captain Kimo here and those are the resulting images. Very cool:-


BMW E36 Blog: The ultimate BMW E36 M3 information source.


Want to receive exciting tips & information about BMW E36 cars? Enter your Email:-


posted in Photos, Uncategorized | Comments Off on BMW E36 with Corvette Engine – Art