BMW E36 Blog

BMW E36 M3 Brake Light Switch Replacement . . . DIY

15th December 2008

BMW E36 M3 Brake Light Switch Replacement . . . DIY


Hi Guys,

I wrote a post about replacing BMW E36 brakes switch before as this is a very common problem in the BMW E36 cars. Yesterday, Jeff was very kind and sent me a link to a video on YouTube that may explain the process easier, so I decided to publish it on the blog. I’m sure you’ll find this video very easy to understand and follow.

Note: I’ve already found many useful videos on the YouTube which were created by the user "fiveightandten". Maybe you want to take a look there?

Disclaimer: Use this info at your own risk!! The author is not responsible if this didn’t work for you :-).

Take a look:-


BMW E36 Blog: The Ultimate BMW E36 M3 Information Source.

Want to receive exciting tips & information about BMW E36 cars? Enter your Email:-


posted in Brakes, Do It Yourself, Technical Info, Tips & Tricks, Uncategorized, Videos | Comments Off on BMW E36 M3 Brake Light Switch Replacement . . . DIY

24th March 2008

Tips For The BMW E36 Owners


This is a list of tips for the BMW E36 owners. Some are for the new owners and some are for the experienced and some of these tips are made just for fun. Read the list carefully, I hope you find it useful and enjoyable:-

Note: I underlined some of the tips that I think are very important.

The coolant pump (water pump) will either fail or start leaking.

The upper radiator hose from the thermostat housing will break.

The cooling system may require several bleed sessions to completely rid the system of air. The coolant low indication will appear on the OBC.

The VANOS rattles like pebbles in a tin can.

The valve train sounds like a diesel after sitting for a few days or on cold morning start ups.

The brake pad sensors do not require replacement unless the brake pad symbol is illuminated in the instrument cluster.

The brake circuit failure indication on the OBC is cleared by replacing the switch located above the brake pedal.

The clutch pedal squeaks and moves laterally due to worn bushings. Replace with Delrin AF bushings.

The clutch slave cylinder is a high fail component. Replace it and bleed the clutch system before dropping large cash on a clutch job.

Flush and bleed the brake fluid every two years.

Flush and bleed the cooling system every two years. Use BMW coolant and distilled water 50/50 mix.

Replace the thermostat housing with an aluminum aftermarket.

There are no adverse effects of using synthetic fluids at any mileage.

The shifter can be replaced with a short shift kit, including Delrin AF bushings, for ~$175.00

Wheel offset means the number of millimeters the mounting surface is from the centerline of the rim.

Buy a quality clicker type torque wrench.

Buy a Bentley Manual.

Batteries fail when the weather turns cold.

Belt tensioner and idler pullies fail and make hideous noises.

Buy a set of Blitz Rhino ramps.

Mobil 1 synthetic engine oil is available at Wal-Mart for cheap.

Distilled water is in the water aisle at the grocery store.

Buy a quality floor jack.

Buy quality jack stands.

Buy wheel chocks.

Buy a fire extinguisher.

Torque wheel bolts to spec. to avoid rotor warp.

Establish a good relationship with the parts guy at the local dealer.

Tip said parts guy.

Clutch Judder is normal in traffic jams due to hot clutch plates

Don’t buy Lexus type rear lights, its not big nor clever!

Does my car have LSD? Solution; get in some dirt or sandy pavement (as not to abuse the car) and spin the damn tires, or jack the rear up and turn one rear wheel and see if the other spins the same way.

Yellowing and faded plastic headlight covers can be restored by using Mequiars #10 and #17 Clear Plastic Cleaner and Polish

The dealer will try to [Oops!] you! If there are no independent bimmer mechanics in your area, leave a jar of vaseline with the dealership service manager along with your keys

The check engine light is USUALLY caused by the o2 sensor but there may be other reasons for it to be set off

The little O with ridges around it are the brake pad sensors. They are in the LF and RR

The e36 does have a ‘natural’ lean when driverless and looked at from behind

DTM tips were invented Osama bin Laden….don’t support terrorism

OBD2 cars cannot be ‘chipped’ there must be a software download

Chips and ‘sharked’ downloads merely advance the ignition timing and will not make your car beat a Corvette

E36’s are not drag cars, due to their diff ratios. If an Integra beats you, your stoopid azz deserves it

Larger rims and speaker boxes will add weight and slow down your car although you think louder means it’s moving faster

When you hear a “thunk” from the middle of the car, it’s probably the Guibo. (flex disk)

When you hear a “thunk” from the back of the car, it’s probably the Rear Shock Mounts. (RSMs)

If it’s cold, and you have trouble starting the car, you probably have a cold starting problem.

$tealer survival list includes: credit card with high credit limit, ETK & TIS, an attorney, and Vaseline.

Q: I just changed my spark plugs now I’m getting rough idle.
A: Gee, could it be the new Platinum+4 spark plugs you just put in?

RTFM – Read the Farking Manual!

The *ding* you hear when it is cold out means It IS cold out, duh! (dings at 38F)

325/328/M3 exhausts are interchangeable. 318 are not.

Buy an genuine BMW water pump

An M3 lever is a short shifter for a 325

A Z3 lever is a short shifter for a 328

Have all rear bushings inspected regularly on 325s

Oil the seats regularly

There is a moonroof available but it is very expensive.

If you want nitrous, you’ve bought the wrong car 😆 .

The value of a car does not increase with mods by any logical amount

Yes, red cars ARE faster

This car will NOT get you laid.

A faulty seatbelt sensor will cause the SRS warning light to stay on

Not closing the gas cap all the way will cause an engine warning light just about every time.

Once you take the dashboard apart you will NEVER get the glovebox door to line up perfectly again.

before disconnecting the battery. Make sure you write down the radio code or have the radio code card that comes in the owners manual.

The most popular setup of aftermarket name brand shocks for the E36 are H&R w/ Bilsteins.

The tire in the trunk helps to maintain a near 50-50 weight ratio. If you decide to auto-X the car, you may want to leave the spare tire in the car.

For OBDI E36’s you can use the pedal trick to get the fault codes. For OBDII, you will need a code reader.

If you find oil in your spark plug well, most likely cause is that your valve cover gasket is leaking.

You can “double lock” your doors by turning your key all the way to the right from the drivers side door and all the way left from the passenger side door.

The two significant problems on the early 318’s were the profile gasket (which is not a head gasket) and the Bad Valeo alternators

Pulsating headlights usually indicates your voltage regulator or alternator needs changing

The profile gasket affected only the M42 engines

The 318’s have had 3 separate belt and pulley configurations between the M42 and M44

Altezza tailights were created by Satan himself…do not support raw evil

Chips do work, but the wont make your car wheelie like herbie the luv bug it will simply increase your ignition timing for a more robust/smoother torque curve


BMW E36 Blog: The Ultimate E36 Information Source.

Want to receive exciting tips & information about BMW E36 cars? Enter your Email:-


posted in Brakes, Cooling System, Electrical, Engine, Performance, Technical Info, Tips & Tricks, Uncategorized | 2 Comments

15th March 2007

Replacing BMW E36 brakes switch!

Hello my friends,


The BMW E36 brakes switch can fail easily and you should always check to make sure that your brakes are working fine. Of course, if you’ve checked and found that the brake lights are not working, you should fix the problem. First, you should check the rear lamps to make sure they’re working fine. If you found that they’re working fine, this means that you have to replace your brakes switch. The following article (which I found originally here) will guide you through this simple process . . . so enjoy it and after you finish, send me some $$$ LOOOL! just kidding.


Disclaimer: Use this procedure at your own risk!! I’m not responsible for your mistakes man! 😀


There may come a time when someone on the road motions to you about your brake lights not coming on. The brake pedal switch (Figure 1) in both the E30 and E36 BMWs gets a lot of use, and has a tendency to fail once and a while. Replacement is really easy, and should take only about 30 minutes maximum.


The first step is to verify that your brake lamps are not working. If you’re by yourself, then wait until night time and back up against a brick wall. You should see the reflection off of the wall when you step on the brakes – if you don’t, then your switch is probably shot. It’s important to note that at least on some years, the BMW warning system that tells you when a lamp is out will not tell you if the switch is broken – you will have to figure it out for yourself.


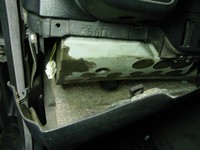
The first step is to gain access to the switch. Remove the panel directly above the driver’s side foot well. This panel is secured by a few screws (Figure 2), and a few snaps as well (Figure 3). In addition, you may have an electrical speaker unit attached to the panel. Disconnect the harness (Figure 4) and pull the panel down (Figure 5).


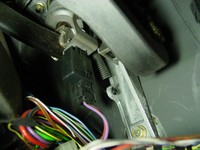
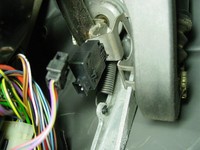
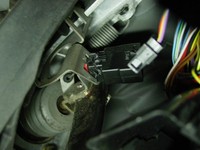
The brake switch is shown in Figure 6. It’s the rater large switch assembly that moves in conjunction with the brake pedal. Remove the harness from the brake switch (Figure 7) and yank it out of it’s bracket. I found that I had to break the plastic housing of the switch in order to remove it (Figure 8). That’s perfectly okay, since you will be replacing it with a new one very soon anyways.


To finish the job, simply install the new switch into place, and reconnect the wire harness. Test the brake lights to make sure that they are working properly, and then reinstall the knee panel.


Well, there you have it – it’s really not too difficult at all.

Are you looking for more do it yourself procedures (DIY) ? I recommend the Bentley BMW 3 series service manual for you. I got it and I think it’s a gold mine for us -BMW E36 Owners-. If you didn’t grab your copy yet, get it right now! I’m sure you’ll find this book worth every penny you’ve paid for. Get the Bentley BMW 3 series service manual


Wait for more from . . . BMW E36 Blog


Best regards,

Tony Sticks.

Want to receive exciting tips & information about BMW E36 cars? Enter your Email:-


posted in Brakes, Do It Yourself, Technical Info | 6 Comments

8th February 2007

BMW E36 Handbrakes adjustment!

Hello my friends,


I was looking for information about BMW E36 and I found this article about how to adjust BMW E36 handbrakes. Every time I pull the handbrake, I notice that it goes far more than it should and I notice also that it doesn’t stop the car 100%. Usually, when I release the brake pedal, after pulling the handbrake, the car moves slightly and then stops. This shouldn’t happen and the following procedure should fix this problem. So, if your car is like mine, then you have some work to do instead of reading this post . . . well, you can finish reading this post and then do the work 😉


Disclaimer: Use this procedure at your own risk!! There’s no way you can blame me for breaking your car this time ..ok ? then proceed 🙂


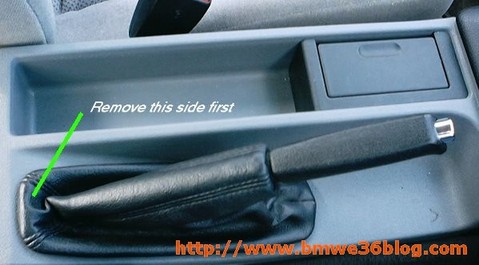
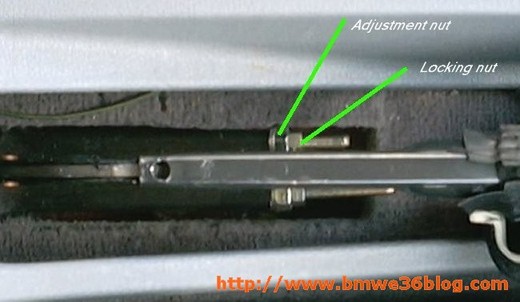
To adjust the handbrake you need to carefully pull up the leather gaiter by the rear of the base base and pull out of the way it turn until it’s inside out. Put the car in 5th gear and slowly release the handbrake. Undo the top locking nut and adjust the handbrake travel by tightening or loosening the lower bolts i.e. tightening makes the travel shorter.


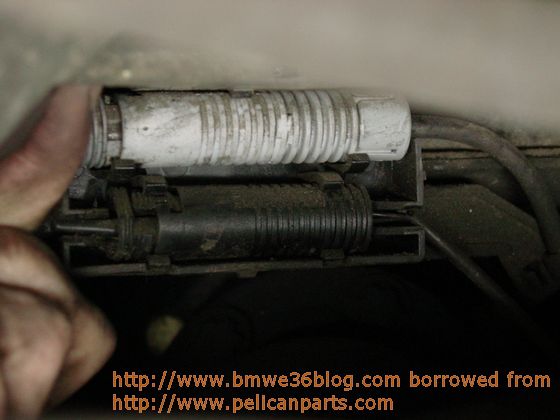
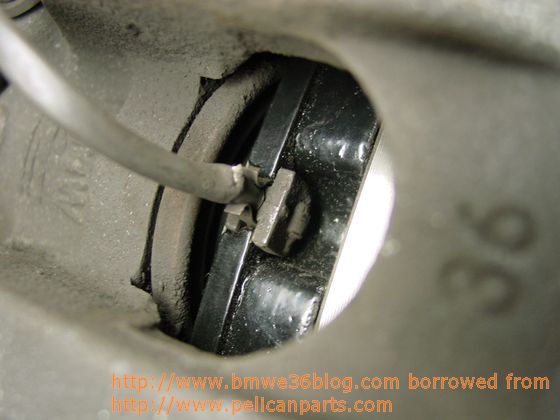
The handbrake is adjusted correctly when it takes between 5 and 10 clicks to be fully on, you can check both rear brakes are equally adjusted by slowly rolling the car forwards and stopping it on the handbrake, if you feel it rocks the car, the side that rises first is this side that is braking more than the other so either loosen it off a bit or tighten up the other side, don’t rely on looking at the two threads and adjusting each one until they are equal as this doesn’t take into account cable stretch and differing pad wear etc – this can clearly be seen in the picture.


Once they are adjusted equally tighten the top locking bolts and clip the handbrake leather gating back into place.


Are you looking for more do it yourself procedures (DIY) ? I recommend the Bentley BMW 3 series service manual for you. I got it and I think it’s a gold mine for us -BMW E36 Owners-. If you didn’t grab your copy yet, get it right now! I’m sure you’ll find this book worth every penny you’ve paid for. Get the Bentley BMW 3 series service manual


Wait for more from . . . BMW E36 Blog


Best regards,

Tony Sticks.

Want to receive exciting tips & information about BMW E36 cars? Enter your Email:-


posted in Brakes, Do It Yourself, Technical Info | 5 Comments

26th December 2006

Replacing BMW E36 Brake Pads

Hi Guys,


I found this nice article ,which was written by Wayne R. Dempsey, on this page. I thought that many of you guys would like to know how to change these pads. For those who don’t like to use their hands, at least, it’s a nice thing to know how to do it.


I saw that many times being done, but there’s nothing better than doing the work yourself to make sure you learned it, so here you go … enjoy. Please remember to wash your hands after you’re done 🙂


Disclaimer
: Use it at your own risk!


Replacing your brake pads is one of the easiest jobs to perform on your BMW. In general, you should inspect your brake pads about every 10,000 miles, and replace them if the material lining of the pad is worn down enough to trigger the pad replacement sensor. In reality, most people don�t inspect their pads very often, and usually wait until they see the little brake warning lamp appear on the dashboard. It’s a wise idea to replace the pads, and inspect your discs as soon as you see that warning lamp.


     If you ignore the warning lamp, you may indeed get to the point of metal on metal contact, where the metal backing of the pads may be contacting the brake discs. Using the brakes during this condition will not only give you inadequate braking, but will also begin to wear grooves in your brake discs. Once the discs are grooved, they are damaged, and there is almost no way to repair them. Resurfacing will sometimes work, but often the groove cut will be deeper than is allowed by the BMW specifications. The smart thing to do is to replace your pads right away.


     Brake pads should only be replaced in pairs � replace both front pads or both rear pads at a time. The same rule applies to the brake discs that should be checked each time you replace your brake pads.


     The procedure for replacing pads on all the wheels is basically the same. There are slight configuration differences between front and rear brakes, but in general the procedure for replacement is similar. The first step is to jack up the car and remove the road wheel. This will expose the brake caliper that presses the pads against the disc


Tip: Make sure that the parking brake is off when you start to work on the pads.


     If you look inside the caliper, you will see the brake pads – usually they will look very thin, as is shown here


Begin by removing the small plastic cap that covers the caliper guide bolts


The BMW caliper used on the 3-Series (and many other BMWs) is a single piston caliper design. One piston presses against the side of the brake disc, and the whole caliper slides on the guide bolt to achieve equal pressure on the disc from both pads.


replace the brake pads, you need to remove the caliper. Remove both guide bolts from the
caliper


Then remove the brake pad retaining clip (keeps the pads from rattling)


Make sure you wear safety glasses during this step, as the clip can come flying off if you’re not careful. Then, use a pair of needle-nose pliers to remove the brake pad sensor


After the guide bolts have been removed, you should be able to simply lift the caliper off of its mount


Suspend the caliper using some zip-ties or rope – don’t let the caliper hang from its rubber hose (very bad). See the follow screenshot for details.


As this point, you can pluck the outer brake pad out of the caliper, and use a screwdriver to pry the inner pad out of the caliper piston. The caliper should resemble this when you’re done.


Once you have the pads removed, inspect the inside of the caliper. You should clean this area with some compressed air and isopropyl alcohol. Make sure that the dust boots and the clamping rings inside the caliper are not ripped or damaged. If they are, then the caliper may need to be rebuilt.


At this point, you should inspect the brake discs carefully. Using a micrometer, take a measurement of the disc thickness. If the disc is worn beyond its specifications, then it�s time to replace it along with the one on the other side. See our Pelican Technical Article on Replacing BMW Brake Discs for more information.


The installation of the new brake pads is quite easy. You will need to take a small piece of wood or plastic and push the caliper piston back into the caliper


This is because the new pads are going to be quite a bit thicker than the old ones, and the piston is set in the old pad�s position. Pry back the piston using the wood, being careful not to use too much force. Using a screwdriver here can accidentally damage the dust boot and seals inside the caliper, and is not recommended. Be aware that as you push back the pistons in the calipers, you will cause the level of the brake reservoir to rise. Make sure that you don�t have too much fluid in your reservoir. If the level is high, you may have to siphon out a bit from the reservoir to prevent it from overflowing. Also make sure that you have the cap securely fastened to the top of reservoir. Failure to do this may result in brake fluid accidentally getting on your paint.


When the piston is pushed all the way back, you should then be able to insert the new pads


into the caliper. If you encounter resistance, double check to make sure that the inside of the caliper is clean.  Simply snap the inner brake pad into place using your hand


When firmly mounted, the new pad should resemble this


     The process for assembly is the reverse of the disassembly.  Mount the caliper back onto its mounting bracket, surrounding the brake disc.  If the caliper won’t fit, then you need to push in the piston a bit more until the space in-between both pads is wide enough for the brake disc to fit.  Tighten down the guide bolt using a torque wrench to 22 ft-lb (30 Nm).


     If your brake sensors activated the lamp on your dashboard, they should be replaced with new ones.  Disconnect the sensor


and plug in the new one.  Then snap the new sensor into the small gap in the brake pad


     You also may want to spray the back of the brake pads with some anti-squeal glue. This glue basically keeps the pads and the pistons glued together, and prevents noisy vibration. Anti-squeal pads can also be purchased as sheets that are peeled off and placed on the rear of the pads.

     When finished with both sides, press on the brake pedal repeatedly to make sure that the pads and the pistons seat properly. Also make sure that you top off the master cylinder brake fluid reservoir if necessary. Brake pads typically take between 100 and 200 miles to completely break in. It�s typical for braking performance to suffer slightly as the pads begin their wear-in period. Make sure that you avoid any heavy braking during this period.

     Well, there you have it – it’s really not too difficult at all. 


Are you looking for more do it yourself procedures (DIY) ? I recommend the Bentley BMW 3 series service manual for you. I got it and I think it’s a gold mine for us -BMW E36 Owners-. If you didn’t grab your copy yet, get it right now! I’m sure you’ll find this book worth every penny you’ve paid for. Get the Bentley BMW 3 series service manual


Wait for more from BMW E36 Blog


best regards,

Tony Sticks.

Want to receive exciting tips & information about BMW E36 cars? Enter your Email:-


posted in Brakes, Do It Yourself | 11 Comments

  • Our Sponsors

  • Forum Posts

  • Calendar

  • December 2024
    M T W T F S S
    « Jun    
     1
    2345678
    9101112131415
    16171819202122
    23242526272829
    3031