Installing Silver Gauge Cluster Rings for your BMW . . . DIY!
posted in Do It Yourself, Interior, Technical Info |Let me start this post by welcoming our new friend Denise Wright. As you may know I’ve been trying to make a group of BMW E36 enthusiasts from the readers of this blog. I have posted a previous topic Welcome BMW E36 blog readers! in which I asked everyone who reads this blog to write a little bit about him/her self. So if you didn’t read this post yet please do and lets hear from you. I feel really happy when I hear from you guys.
OK, now for the post of today that I know most of you will like very much. This is a DIY (do it yourself) post which will teach you how to install those cute silver gauge cluster rings on your BMW. I really love the way the gauges look after the installation. I also love this DIY as it’s very simple and can be done by almost anyone who doesn’t have any experience in cars. Let not forget to thank Komodo who wrote this great DIY.
Enjoy the post and lets see how things go with you.
Disclaimer: Use this info at your own risk!! I’m not responsible if this didn’t work for you.
This is a DIY for installing those silver gauge rings you can find all the time on
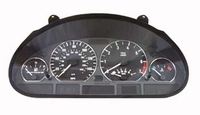
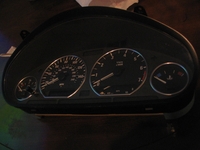
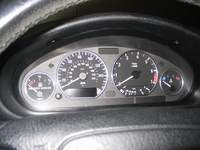
eBay for about $30-35. Here is an after stock photo of how this mod changes your car. It’s a simple mod, but makes a big difference.
Tools needed:
– T10 Torque Screwdriver with a long thin handle (one screw is pretty deep inside)
– Phillips head screw driver
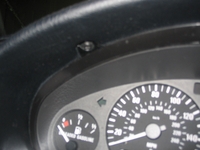
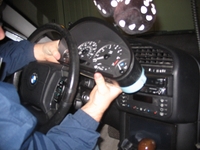
1) Unscrew the gauge cluster. There are two screws and some friction holding your cluster in. One screw is on each side of the top, as shown in this picture:
Unscrew those screws and push on the bottom of the glass to loosen the unit. Mine was stuck in there pretty good, so it took a good amount of pressure and jiggling to break it free.
2) It should now slide forward and up to the steering wheel.
IMPORTANT: At this point you’re about to begin messing with electrical parts, so please stop and disconnect your battery before continuing. Leaving it plugged in might make you physically unable to finish this DIY.
When you reach behind the unit, you’ll feel three wire bundles connecting it to the car. Two are on the right (one big vertical one, and one small horizontal one just below it), and one big vertical plug is on the left.
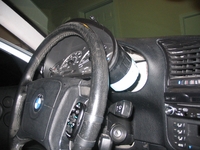
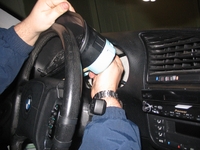
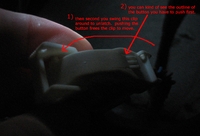
This is probably the trickiest part of the whole installation. You must reach behind the unit (probably blindly) and unplug them, however they are not a normal plug. There’s a little button you must push in the middle of the latch, then slide the clip up until the connection comes lose. Here’s a picture to try and explain it better:
Then after it’s free just slide it out beside the wheel (again, might require a bit of creative shaking and squeezing, but it’s easily possible.
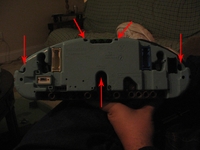
3) Now you should have the unit out of the car. Bring it inside or somewhere with good light and go get your T10 torque screw driver. There’s 5 screws, as shown by this image of the back of the cluster. Two up top, one on each side, and one deep screw in the very middle.
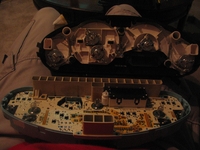
Unscrew them all, pull gently, and the unit should split open:
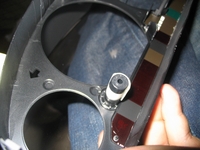
4) Now look at the faceplate half of the unit (the top half in the picture above). There are three unique, German engineered, “finger screws” holding the faceplate against the glass. It’s the round black circle knobs on each side, and one in the top middle. To unscrew these, simple twist the white part the direction they will move to free the face plate. Here’s a close up of one of the finger screws:
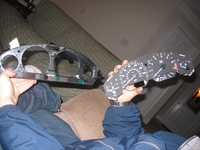
5) After all of them are turned to the unlocked/open position, gently pull the faceplate up and it should separate:
Now simply take your rings and pop them on to the left part of the above picture. Mine were very tight and clipped on, the friction plenty to hold them on through anything, however I know some of the rings are a lot looser and might require some creative glueing to get them to stay.
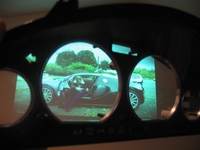
Here’s a picture of the rings on just that piece. Notice the Bugatti Veyron Top Gear on the projector in the background. This is a must for this DIY. If you don’t watch Top Gear while installing the rings, they won’t work.
6) Now the reverse install. Put the faceplate back in the glass (re-screwing the three thumb screws all the way to ensure nothing moves), then using the torque screws, reattach the back half of the gauge cluster.
Take it back to your car then, slide it beside the steering wheel, push it firmly into it’s hole, and screw the top two screws in.
Congratulations, you now have silver gauge rings installed in your car.
Are you looking for more do it yourself procedures (DIY) ? I recommend the Bentley BMW 3 series service manual for you. I got it and I think it’s a gold mine for us -BMW E36 Owners-. If you didn’t grab your copy yet, get it right now! I’m sure you’ll find this book worth every penny you’ve paid for. Get the Bentley BMW 3 series service manual
BMW E36 Blog: The ultimate BMW E36 information source.
Related Posts:-

Want to receive exciting tips & information about BMW E36 cars? Enter your Email:-

 (4 votes, average: 4.00 out of 5)


 (4.86 out of 5)


posted on April 15th, 2008 at 4:37 am
posted on April 15th, 2008 at 10:30 am
posted on April 15th, 2008 at 7:00 pm
posted on April 15th, 2008 at 9:30 pm
posted on April 15th, 2008 at 11:50 pm
posted on April 16th, 2008 at 12:05 pm
posted on May 27th, 2008 at 8:03 am
posted on May 27th, 2008 at 5:55 pm