BMW E36 Blog

Unlock the check button functionality for BMW E36 On Board Computer (OBC)

29th October 2007

Unlock the check button functionality for BMW E36 On Board Computer (OBC)


Hi Guys, One of the issues that were annoying me about my car is the OBC (On Board Computer) check button. Whenever I press that button, I was receiving this row of orange squares that I didn’t know what they meant. After a while, I thought this meant the car was ok and that there’s nothing wrong to report until today when I found an article that’s talking about this exact problem and how to unlock the check functionality. It turned out that the row of orange boxes (which looks like a full battery) meant that the check functionality is disabled in the car and that you have to enable it simply by following some easy steps.

Disclaimer: Use this info at your own risk!! I’m not responsible if this didn’t work for you :-).

To unlock your car’s check button functionality:

1. Hold down 1000 and 10 to get access to the hidden menus. [TEST –]

Note: please notice that this may not work if you didn’t unlock the hidden menus in your OBC using TEST 19. If you don’t know how to do this, please refer to my previous post BMW On Board Computer (OBD) secrets!.

2. Enter 11, and press Set/Reset. You will notice this on the OBC screen [EINHEIT 1: xx] (xx will be a number)
3. Change this EINHEIT 1 value to 71, using the 10 and 1 buttons, then press Set/Reset.
4. Press the 1000 button once to move to the next value which is [EINHEIT 2 xx] (xx will be a number)
5. Change this EINHEIT 2 value to FF, using the 10 and 1 buttons, then press Set/Reset.

Note: I’ve found that this value was already set correctly on my OBC.

6. After that, just press your "check" button.

I’ve tried this on my car and I have to admit it didn’t work completely as expected. Now, I receive this "Check Control Inactive" error which apparently trying to tell me that I’m one step short from making this work on my car.
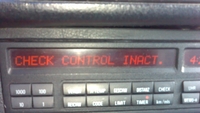
Video of my car OBC after unlocking check functionality

So, if anyone can help with this, please let me know.

If your car is:
325i 1994 or 318is 1993: Set EINHEIT 1 value to 71
320i 1994: Set EINHEIT 1 value to 7B
328i 1995: Set EINHEIT 1 value to BA
M3 1997,1998: Set EINHEIT 1 value to B3

BMW E36 Blog: The ultimate BMW E36 information source.

Want to receive exciting tips & information about BMW E36 cars? Enter your Email:-


posted in Technical Info, Tips & Tricks | 79 Comments

19th August 2007

Fixing your BMW OBC (On Board Computer) lights . . . DIY!

If you have a BMW with OBC (On Board Computer). It’s most likely that you will face a problem in its back lights sooner or later. Luckily I didn’t face this problem with my car yet, but my brothers car has this problem and his car’s OBC looks really disgusting. The problem begins when one of the back lights of the OBC decides to die and your OBC which you love to play with from time to time starts to look like a guy with black eye. At that time, you know that you have to do something about it and I know. You will be thinking … man, I shouldn’t mess with this OBC because it looks really complicated and I may end up breaking something. Guess what? you are wrong! Fixing the OBC back lights is a very simple task and it’s the subject of today’s post. I hope you enjoy this post and find it useful for your car. By the way, I want to thank Eduardo Cesconetto the original author of this great post.


For those of you who like to fix their BMW car(s) by themselves, I recommend you to get the Bentley BMW 3 series service manual which is one of the best books I’ve ever read. I got it and recommend you to get one for you as it will save you too much time and effort while fixing your car.


Disclaimer: Use this info at your own risk!! I’m not responsible if this didn’t work for you.

My OBC had only one light working, the one in the left corner, and so it was a pain to look at it, and it looked like the LCD was burned, but it comes out is just a matter of replacing some light bulbs. You can get the bulbs at the dealership for $2.50 each, and just ask for the light bulb for the OBC of your year/model car.


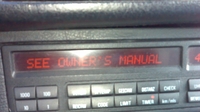
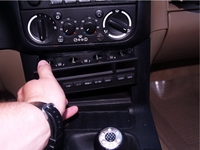
Here is my OBC:


The first thing to do is to carefully place a flat head screwdriver in one of the sides in the crack between the OBC and the bezel, carefully to not scratch anything, then apply a mild pressure pushing the handle of the screw driver outwards, the OBC will pop out a little bit.


Repeat the same procedure in the other side.


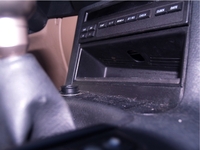
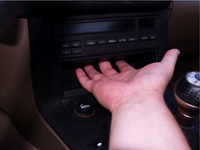
Under the OBC and in the top of the sunglass compartment (or whatever you want to call it) there is a hole as shown on this picture:


Put your middle finger in that hole and find the back of the OBC, then push it out slowly but firmly


That will give you enough space to pull the OBC out, slowly so you don’t pull the harness of the OBC


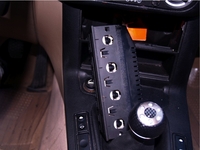
On the top side of the OBC, you will see the 4 light bulbs:


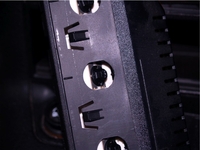
A bit closer…


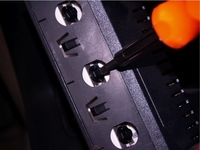
Using the same flat head screwdriver, rotate the bulb counter-clockwise 1/4 turn to release the bulb


Install the new bulbs and follow the guide backwards to put the OBC back in place.


I suggest you replace all the 4 bulbs at once, otherwise you can end up with uneven light across the display


Are you looking for more do it yourself procedures (DIY) ? I recommend the Bentley BMW 3 series service manual for you. I got it and I think it’s a gold mine for us -BMW E36 Owners-. If you didn’t grab your copy yet, get it right now! I’m sure you’ll find this book worth every penny you’ve paid for. Get the Bentley BMW 3 series service manual


BMW E36 Blog: The ultimate BMW E36 information source.


Want to receive exciting tips & information about BMW E36 cars? Enter your Email:-


posted in Do It Yourself, Interior, Technical Info, Tips & Tricks | 14 Comments

20th February 2007

BMW E36 on board computer . . . learn how to use it

Hey Guys,


I’ve been looking for information about how to use the on board computer (OBC) for sometime now and I finally found it 🙂 Yaay! Below I will list what you can accomplish using the on board computer, so read on and let me know what you think.


Disclaimer: Use this procedure at your own risk!!


TEMP (A-TEMP)

Outside temperature


Displays the outside temperature after pressing the TEMP (A-TEMP) button. If it falls below +3�C, a gong signal is heard as a warning; the outside temperature is displayed and flashes for eight seconds.
The warning is repeated if the temperature rises to at least +6�C and then drops again to +3�C.


RANGE (REICHW)

Probable range


This display indicates after pressing the RANGE (REICHW) button how far the car can probably be driven on the fuel remaining in the tank. The value takes into account the way in which the car has so far been driven. A plus sign (+) in front of the displayed value means that it is still undergoing a correction process (measuring tolerance).
If three horizontal display segments flash, the range is below 15km and the car should be refuelled as soon as possible.
The on-board computer registers fuel added to the tank only when the engine has been stopped and the quantity of fuel exceeds four litres.


SPEED (GESCHW)

Average speed


Shows the average speed since the last reset. To display press the SPEED (GESCHW) button.

To reset the calculation press SET/RES. The on-board computer doesn’t include the time the car is standing with the engine off in its calculation.


CONSUM (VERBR)

Average fuel consumption


Average fuel consumption can be computed for two distances in parallel. Each time the button CONSUM (VERBR) is pressed, the display alternates between the average consumptions for distances one and two. There is also an indication of whether distance one or two is being displayed.

To reset the calculation press SET/RES.


DIST (DISTANZ)

Distance from destination


After pressing the DIST (DISTANZ) button the display shows how far the car is from the destination, provided the total distance was input before the journey started.
The probable time of arrival, which is recalculated continually as driving conditions change, is also displayed.
If the car has already completed the full distance which was input, the distance value is preceded by a minus sign ().


LIMIT

Speed limit


If you exceed a speed limit which you have previously input, you will hear a warning gong. The corresponding LED flashes and the display shows the stored limit briefly. The warning is repeated if the speed limit is again exceeded after the car’s speed has in the meantime dropped by at least 5 km/h below the entered value.
To cancel the speed limit input press the LIMIT button again. The LED goes out but the stored value is not lost and can be re-activated with the Limit button.
To adopt the car’s actual speed as the limit value press the LIMIT and then the SET/RES button.


km/mls

Display units changeover

Press the km/mls button to switch display units between km/h and mph or litres per 100km and mpg and back.


CODE

Immobilizing vehicle


A 4-digit number can be entered with the "CODE" key in ignition switch position 1. The engine hood and radio contact is monitored when the vehicle is parked with CODE armed. The engine cannot be started until the same code number is entered again in the BC to disarm the system. Depending on the selected function, the small display shows either the date or the time. Date and time can be displayed for 8 seconds by pressing the key in ignition lock position "0".


CHECK

Check control faults


A display test is performed if there are no check-control faults and the "CHECK" key is pressed for at least 10 seconds. The test appears immediately after pressing the "CHECK" key in ignition switch position 1 or when no check-control is coded in the BC V.


MEMO

Arbitrary reminder


An hour signal and/or any arbitrary reminder time can be programmed or checked with the "MEMO" key:


After pressing the "MEMO" for 3 seconds enter "MEMO" appears in the large display, ":00" appears in the small display.


After entering any time (minutes) with the digit keys "1" and "10" and acknowledging with the "SET/RES" key, the hour signal then sounds 15 seconds before each full hour plus the set time in minutes.


Gong time = Full hour plus input time in minutes minus 15 seconds.


Wait for more from . . . BMW E36 Blog


Best regards,

Tony Sticks.

Want to receive exciting tips & information about BMW E36 cars? Enter your Email:-


posted in Technical Info, Tips & Tricks | 8 Comments

  • Our Sponsors

  • Forum Posts

  • Calendar

  • October 2024
    M T W T F S S
    « Jun    
     123456
    78910111213
    14151617181920
    21222324252627
    28293031