BMW E36 Blog

Replacing BMW E36 Spark Plugs . . . DIY!

21st October 2007

Replacing BMW E36 Spark Plugs . . . DIY!


I have found this DIY (Do It Yourself) procedure that will help you to replace your BMW E36 spark plug. I know that you may think this task is very easy. But I think this article has some great information about spark plugs and about the oil that may be leaking inside your engine. So, read it carefully, I’m sure you’ll find it interesting.

Concerning the type of spark plugs that you should use for your E36, I prefer going with the Bosch spark plugs for my BMW, but again it’s up to you to decide which type to use. NGK is another good alternative, but I still prefer Bosch over it.


Disclaimer: Use this info at your own risk!! I’m not responsible if this didn’t work for you :-).

You can read the full article here


Are you looking for more do it yourself procedures (DIY) ? I recommend the Bentley BMW 3 series service manual for you. I got it and I think it’s a gold mine for us -BMW E36 Owners-. If you didn’t grab your copy yet, get it right now! I’m sure you’ll find this book worth every penny you’ve paid for. Get the Bentley BMW 3 series service manual

BMW E36 Blog: The ultimate BMW E36 information source.


Want to receive exciting tips & information about BMW E36 cars? Enter your Email:-


posted in Electrical, Technical Info | 5 Comments

23rd September 2007

Footwell light for your BMW E36 . . . DIY!


First of all, I want to start this post by welcoming our new friend Sean C who filled his information recently in the Welcome BMW E36 blog readers! post. For those of you who didn’t read that post yet, please do and let us hear from you. Simply, just fill your information in the comments box at the bottom of that post and you’re done. Very easy isn’t it?

I think everyone of you guys will love today’s post as it will show you how easy it’s to install foot well lights inside your BMW. I know that many of you will try to do it because it looks great on your car. If you’re anxious to see the end result of this procedure, simply skip to the end of this post to see a photo of the car at night while the foot well lights are on. I hope you like this DIY and thanks for Jarozila who created the original write-up.

For those of you who like to fix their BMW car(s) by themselves, I recommend you to get the Bentley BMW 3 series service manual which is one of the best books I’ve ever read. I got it and recommend you to get one for yourself as it will save you too much time and money while fixing your car.


Disclaimer: Use this info at your own risk!! I’m not responsible if this didn’t work for you :-).

The BMW parts I used were:

63 31 8 360 588 Lamp (2x)
61 13 8 377 072 Socket Housing (3-pin connector) (2x)
61 13 0 005 197 Bushing Contact (4x)

If you take out your dome light and take a look at the wires you will see a Brown/Red wire (power) and a Brown wire (ground). These are the wires to use if you want the new foot well lights to work with the dome light switch settings.

Using these wires the foot well lights can be set to come on with the dome light when you open the door and they fade out, or you can turn them on with the dome light.

I did not want to run wires from the dome light down the side pillar, so I thought I have to be able to find the wires when I remove the glove box. I found a Brown/Red and a Brown wire and I exposed the core to see if these would work – THEY DID.

It was then just a matter of connecting a few wires into these two cables, making holes in the panel under the glove box and steering wheel, and connecting the lights.

I really like how it looks and it will make it so much easier to find things if they drop on the floor. Was also easier to vacuum with the lights on.

This is where I found the red/brown and brown wires that looked like they went up the back and into the side pillar going up to the dome light.

This is a picture from underneath to show the new wires I connected. I also put in two wires to run over to the driver’s side. The two black wires go the the foot well light, the red & brown wires go over to the driver’s side.

This is the light inserted in the hole I cut on the passenger side.

Foot well lights off during the day with my car in an open car port.

Foot well lights on also during the day in the car port.

Here’s a picture of how it looks at night


Are you looking for more do it yourself procedures (DIY) ? I recommend the Bentley BMW 3 series service manual for you. I got it and I think it’s a gold mine for us -BMW E36 Owners-. If you didn’t grab your copy yet, get it right now! I’m sure you’ll find this book worth every penny you’ve paid for. Get the Bentley BMW 3 series service manual

BMW E36 Blog: The ultimate BMW E36 information source.

Want to receive exciting tips & information about BMW E36 cars? Enter your Email:-


posted in Do It Yourself, Electrical, Interior, Technical Info, Tips & Tricks | 12 Comments

10th September 2007

Installing immobiliser for your BMW E36 . . . DIY!


For those of you who don’t know what an immobiliser is, it’s simply an electronic device that is designed to prevent cars from being hot wired and stolen easily. If a car has an immobiliser installed, this means that the thief will need hours and hours + very good knowledge about cars to be able to get that car to work, or he may simply choose to knock on your door and ask you to give him a hand to fix your car LOOOL 🙂 as he may think it’s not working and needs some fixing. For those of you who are looking to protect their cars from being stolen and care about their car safety, the answer is easy, install a car immobiliser.

I have found this post here which talks about the process of installing an immobiliser for your BMW E36, so I thought I’d post it here in order  for you guys to follow and protect your car. If you’re interested in getting a car immobiliser, you can take a look at this immobiliser on eBay.

For those of you who like to fix their BMW car(s) by themselves, I recommend you to get the Bentley BMW 3 series service manual which is one of the best books I’ve ever read. I got it and recommend you to get one for you as it will save you too much time and money while fixing your car.


Disclaimer: Use this info at your own risk!! I’m not responsible if this didn’t work for you :-).

So you want to install immobiliser like this one? if you know how to solder wires then i think you will qualify
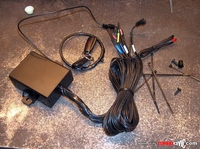
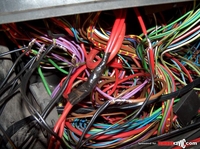
Step 1: Open up fuse box, you will want to make thieves life as hard as possible. You need torx screwdriver. Unscrew two front screws, be careful, apply pressure, do not break torx pattern on heads. Also open drivers side under dash to get access to wires and screws that hold fuse box in place. Unscrew these 4 screws to get fuse box loose
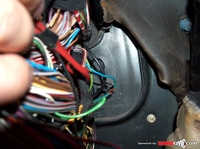
Now you can get access to fuse box rear screws. unscrew them carefully. open the box
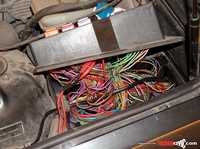
Step 2: Locate circuits that you will immobilise. For example, green/purple wire coming from fuel pump fuse (17)is ideal. Measure voltage on wire( test light or tester one lead grounded):
Ignition off – no voltage
Ignition on – no voltage
Crank and run – +12

When car running, cut the wire- if engine stops( after couple seconds ), you have found right one. You can connect it temporarily together to locate another circuit. Connect it to immobiliser as on its wiring diagram
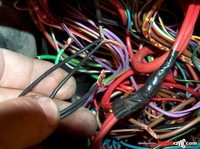
Second circuit can be ignition for ECU. It is green wire going from connection point to engine harness connector outside fuse box. It has power when ignition is on. If you cut it engine will stall immediately, remember that there are couple wires in that connector cut the right one, if you miss, connect back and be more careful next time
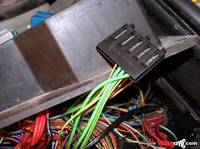
Step 3: Connect it to immobiliser wiring ( connect now fuel pump wire too )

remember power comes from ignition lock and goes to engine harness: twin wires for immobilising, third ignition sense for immobiliser
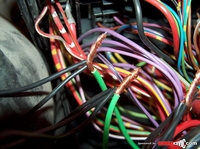
Step 4: Power up immobiliser (red permanent power, brown ground)

Step 5: Solder all wires
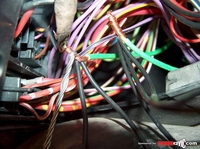
Step 6: Cut sharp edges
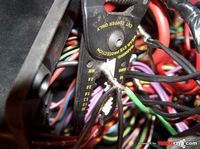
Step 7: Isolate all connections
Step 8: Locate drivers side door switch wire near drivers side speaker (brown/gray/yellow).
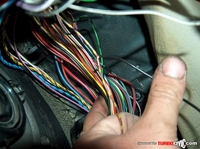
Never connect immobiliser circuits on steering column. It is too easy to reconnect.
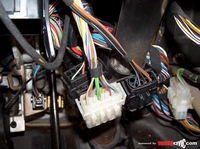
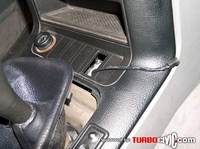
Step 9: Install LED and antenna into center console. antenna can be located anywhere where you want, it does not work through metal.
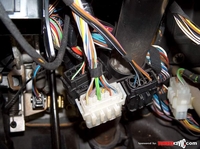
Step 10: Install led and antenna into center console. Antenna can be located anywhere where you want, it does not work through metal
Step 11: You’re done! 🙂

Wiring Diagram:


Are you looking for more do it yourself procedures (DIY) ? I recommend the Bentley BMW 3 series service manual for you. I got it and I think it’s a gold mine for us -BMW E36 Owners-. If you didn’t grab your copy yet, get it right now! I’m sure you’ll find this book worth every penny you’ve paid for. Get the Bentley BMW 3 series service manual

BMW E36 Blog: The ultimate BMW E36 information source.


Want to receive exciting tips & information about BMW E36 cars? Enter your Email:-


posted in Do It Yourself, Electrical, Technical Info, Tips & Tricks | Comments Off on Installing immobiliser for your BMW E36 . . . DIY!

27th August 2007

BMW E36 Fog lights removal . . . DIY!


First of all, let me welcome our new friend here Ricardo Mollinedo. Until now, we have received 8 responses from readers for the post Welcome BMW E36 blog readers!. Well, I still hope that I receive more response from the loyal readers of this blog. So, please if you are a reader of BMW E36 blog, please submit your information here (Welcome BMW E36 blog readers!). We will be glad to hear from you!.

Today’s post is about BMW E36 fog lights removal. I was thinking that this is a very hard task to do because I already tried it on my car and it was just hard. The problem is that the fog lights are in a very bad place that you can’t easily remove or change as my car is maybe 10cm above the ground. This means that every time I needed to change a burned bulb or something, I had to dig deep until I reach it.

It seems that this plan was not very good and that there’s a much easier way to do it. So, if you either looking for changing your burned light or want to change/clean your fog lights, this post is for you. I hope you find it useful.

For those of you who like to fix their BMW car(s) by themselves, I recommend you to get the Bentley BMW 3 series service manual which is one of the best books I’ve ever read. I got it and recommend you to get one for you as it will save you too much time and
money while fixing your car.

Disclaimer: Use this info at your own risk!! I’m not responsible if this didn’t work for you :-).

The fog lights on the E36 are prone to stone chips because they are so low on the ground and can also crack due to thermal stress if you go through a puddle of water when they are hot. Fortunately they are easy and not too expensive to replace. German & Swedish sell original quality replacements for 60$ or alternative ones for 40$.

Pictured below is the drivers side brake duct and fog light. To release the fog light all you need to do is insert a screw driver in the hole at the top and push the releasing clip forwards. The fog light will then pivot on the opposite side and come out.

The picture below shows the release clip on the left and the pivot point on the right of the photo.

If this plastic clip has broken then it is more difficult to remove the fog light. You need to remove the 4 bolts and 2 plastic rivets holding the plastic panel underneath to the bumper. You will probably have to force the rivets out and buy a couple more. They are only about 12p each from a dealer.
Once the panel is off then raise the wheel up a little by for example driving onto a kerb and put your head underneath.

The picture below is what you should be able to see. You will need to hook a flat bit of metal over the top of the bracket and down between the bracket and other side of the lever and then twist it.

The finished result. You might wish to replace the fog light the opposite side as well as you can see from my photo the old fog light glass discolors after a while.


Are you looking for more do it yourself procedures (DIY) ? I recommend the Bentley BMW 3 series service manual for you. I got it and I think it’s a gold mine for us -BMW E36 Owners-. If you didn’t grab your copy yet, get it right now! I’m sure you’ll find this book worth every penny you’ve paid for. Get the Bentley BMW 3 series service manual

BMW E36 Blog: The ultimate BMW E36 information source.


Want to receive exciting tips & information about BMW E36 cars? Enter your Email:-


posted in Do It Yourself, Exterior, Technical Info, Tips & Tricks | 2 Comments

23rd August 2007

Bentley BMW E36 Service Manual . . . A gold mine!


To be honest with you guys, I’ve never been a fan of cars books or service manuals as I think they will not help you much to understand how your car works or even help you fix a problem inside it. I always thought that it is simpler to find what I’m looking for on the web (mainly forums) and so on. However, I think I’ve just changed my idea about these books or at least about a specific book that I heard a lot about. The book is the Bentley BMW E36 Service Manual. I’ve been told that this book is very good and it’s a real gold mine for BMW E36 owners but I was suspecting that it’s being over estimated until I ordered that book from Amazon and started reading it. Well, I didn’t finish reading yet, but I decided to check how I can solve a problem that is happening to my car using this manual and see if it goes well.

My car started hesitating in the last week and the problem seems to be getting worse, so I tried to check it and I know that I have problems in both Oxygen Sensor and Knock Sensor because I’ve tried to clean my ICV (Idle Control Valve) already with no success in resolving this problem. I’ve started reading the section about fuel injection in the Bentley BMW E36 service manual and to my surprise, the book is really awesome. You won’t believe how precise it is when describing the procedure to check your whole fuel injection system starting with the main relay testing and ending with the ICV (Idle Control Valve) testing.

I’m really impressed with this one and I strongly recommend this book to every BMW E36 owner. So even if you’re not into the car do-it-yourself stuff. I think it will help you understand how your car works and even help you trace some of the problems in your car without the need to pay big $$$ for BMW mechanics.

I’m listing below the content of this book so, you can see what does it offer:

  0 General Data and Maintenance
    0.1 Fundamentals for the Do It Yourself Owner
0.2 Maintenance Program
  1 Engine
    1.1 Engine-General
1.2 Engine Removal and Installation
1.3 Cylinder Head Removal and Installation
1.4 Cylinder Head and Valvetrain
1.5 Camshaft Timing Chain
1.6 Lubrication System
1.7 Ignition System
1.8 Battery, Started, Alternator
1.9 Fuel Injection … this is really awesome!
1.10 Fuel Tank and Fuel Pump
1.11 Radiator and Cooling System
1.12 Exhaust System
  2 Transmission
    2.1 Transmission-General
2.2 Clutch
2.3 Manual Transmission
2.4 Automatic Transmission
2.5 Gearshift Linkage
2.6 Driveshaft
  3 Suspension, Steering and Brakes
    3.1 Suspension, Steering and Brakes-General
3.2 Front Suspension
3.3 Steering and Wheel Alignment
3.4 Rear Suspension
3.5 Final Drive
3.6 Brakes
  4 Body
    4.1 Body-General
4.2 Fenders, Engine-Hood
4.3 Doors
4.4 Trunk Lid
  5 Body Equipment
    5.1 Exterior Trim, Bumpers
5.2 Door Windows
5.3 Interior Trim
5.4 Central Locking and Anti-Theft
5.5 Seats
5.6 Sunroof
5.7 Convertible Top
  6 Electrical System
    6.1 Electrical System-General
6.2 Electrical Component Locations
6.3 Wipers and Washers
6.4 Switches and Electrical Accessories
6.5 Instruments
6.6 Exterior Lighting
6.7 Heating and Air Conditioning
6.8 Radio
  7 Equipment and Accessories
    7.1 Seat Belts
7.2 Airbag System (SRS)
  8 Electrical Wiring Diagrams

If you don’t have this book, just get one. It will definitely help you.

BMW E36 Blog: The ultimate BMW E36 information source.


Want to receive exciting tips & information about BMW E36 cars? Enter your Email:-


posted in Technical Info, Tips & Tricks, Uncategorized | 4 Comments