Footwell light for your BMW E36 . . . DIY!
First of all, I want to start this post by welcoming our new friend Sean C who filled his information recently in the Welcome BMW E36 blog readers! post. For those of you who didn’t read that post yet, please do and let us hear from you. Simply, just fill your information in the comments box at the bottom of that post and you’re done. Very easy isn’t it?
I think everyone of you guys will love today’s post as it will show you how easy it’s to install foot well lights inside your BMW. I know that many of you will try to do it because it looks great on your car. If you’re anxious to see the end result of this procedure, simply skip to the end of this post to see a photo of the car at night while the foot well lights are on. I hope you like this DIY and thanks for Jarozila who created the original write-up.
For those of you who like to fix their BMW car(s) by themselves, I recommend you to get the Bentley BMW 3 series service manual which is one of the best books I’ve ever read. I got it and recommend you to get one for yourself as it will save you too much time and money while fixing your car.
Disclaimer: Use this info at your own risk!! I’m not responsible if this didn’t work for you :-).
The BMW parts I used were:
63 31 8 360 588 Lamp (2x)
61 13 8 377 072 Socket Housing (3-pin connector) (2x)
61 13 0 005 197 Bushing Contact (4x)If you take out your dome light and take a look at the wires you will see a Brown/Red wire (power) and a Brown wire (ground). These are the wires to use if you want the new foot well lights to work with the dome light switch settings.
Using these wires the foot well lights can be set to come on with the dome light when you open the door and they fade out, or you can turn them on with the dome light.
I did not want to run wires from the dome light down the side pillar, so I thought I have to be able to find the wires when I remove the glove box. I found a Brown/Red and a Brown wire and I exposed the core to see if these would work – THEY DID.
It was then just a matter of connecting a few wires into these two cables, making holes in the panel under the glove box and steering wheel, and connecting the lights.
I really like how it looks and it will make it so much easier to find things if they drop on the floor. Was also easier to vacuum with the lights on.
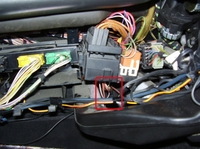
This is where I found the red/brown and brown wires that looked like they went up the back and into the side pillar going up to the dome light.
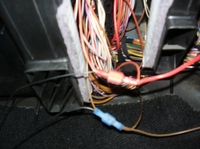
This is a picture from underneath to show the new wires I connected. I also put in two wires to run over to the driver’s side. The two black wires go the the foot well light, the red & brown wires go over to the driver’s side.
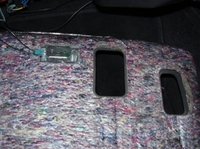
This is the light inserted in the hole I cut on the passenger side.
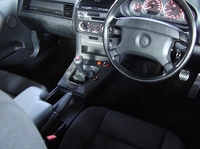
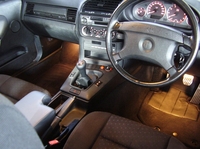
Foot well lights off during the day with my car in an open car port.
Foot well lights on also during the day in the car port.
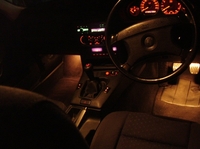
Here’s a picture of how it looks at night
Are you looking for more do it yourself procedures (DIY) ? I recommend the Bentley BMW 3 series service manual for you. I got it and I think it’s a gold mine for us -BMW E36 Owners-. If you didn’t grab your copy yet, get it right now! I’m sure you’ll find this book worth every penny you’ve paid for. Get the Bentley BMW 3 series service manual
BMW E36 Blog: The ultimate BMW E36 information source.

Want to receive exciting tips & information about BMW E36 cars? Enter your Email:-
posted in Do It Yourself, Electrical, Interior, Technical Info, Tips & Tricks | 12 Comments

 (4.86 out of 5)
 (4.07 out of 5)


